Welcome to Moda Fabrics!
Letters to Santa QAL - July 25
Letters to Santa QAL - July 25
Merry 25th of July! We are so excited to kick of the Letters to Santa QAL this month. What do we have in store for you? Sashing/assembly instructions for the first 5 words of the main Moda quilt, 3 filler block patterns, and the most adorable alternate garland project from Moda’s Tammy V.

For a reminder of all the details about the Letters to Santa QAL, see the Intro blog post here about the quilt-along. This is a ‘relaxed fit’ quilt along, where we just want to have some fun with Christmas words with all our extended Moda family! We have our quilts planned, but feel free to jump in with whatever words you like best! The main Moda quilt will finish 75"x94", and include 25 words and 27 filler blocks total. The lettering pattern used is the Mini Alphabet Quilt by Primitive Gatherings, which you can find at your local quilt shop.
THE BLOCKS

There are 25 words total in Moda's quilt, which means we're sharing the setting instructions for 5 blocks at a time. Download a PDF with all the piecing details for July's words here. Moda's Lissa Alexander has been a rock star getting all of these blocks pieced, using a scrappy mix of reds, greens, and low volumes.
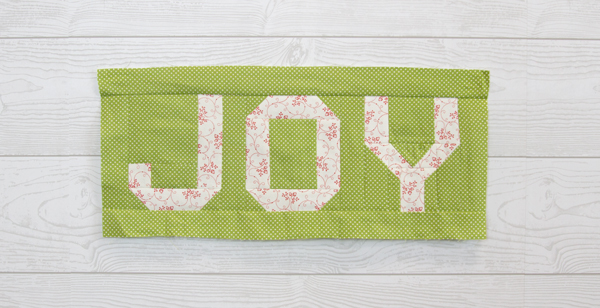
JOY

RUDOLPH
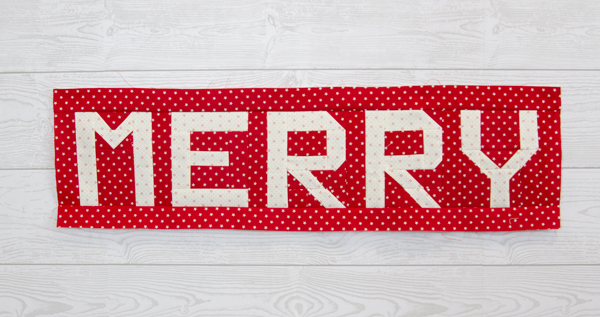
MERRY
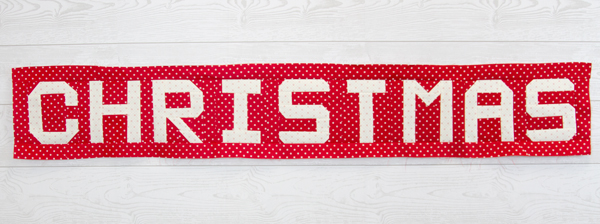
CHRISTMAS

TWINKLE
FILLER BLOCKS 1, 2 & 3
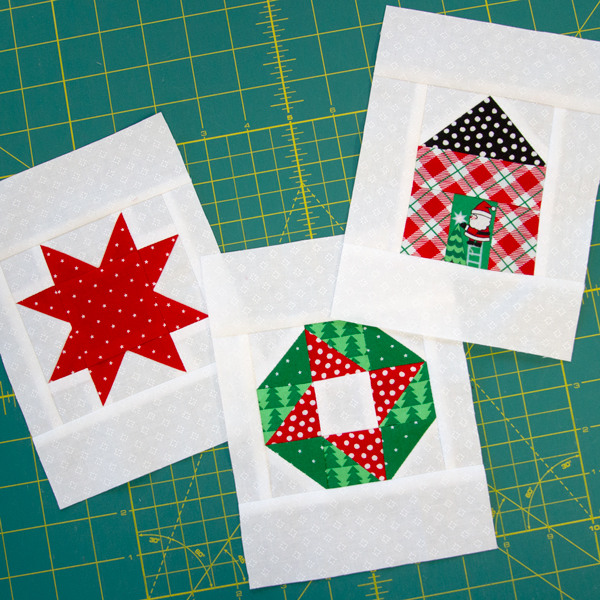
There are also 3 filler block patterns to share this month. Tammy made these blocks out of Candy Cane Lane by April Rosenthal, and they are too cute! That Santa fussy cut in the doorway of the house! She's so good.
If you’re making the Moda version of this project, you’ll make 3 EACH of each filler block. Click the link for each below to download.
You can see here where all of these fall in our quilt layout:

You'll notice for some of the filler blocks, we changed fabrics depending on what helped 'round out' the quilt in certain areas. On row 5, there was a lot of red, so the Family Home block there is all greens. But for the Friendship Wreath block, it's all the same with greens for the 'wreath' and red for the friendship star detail. It's really all up to you! The exact Bellas we used for each block are listed in the pattern downloads.
TIPS FOR PREP & PIECING
- STARCH. Working with such small piecing, this project is a great one to try out starching your fabrics before you sew. It firms up your fabrics (basically, pre-shrinking) and the pieces won't move around on you quite so much going through the machine. Lisa Bongean of Primitive Gatherings has a great explanation & intro on starch here. I (Moda Michelle) had never used starch before, and only a couple blocks in, I was fully converted! You may think that pressing to the side vs. open would be the big quilting divide at the Moda offices--but no, it's whether to starch!
- Start with strips of your fabrics to then cut off of as you go. Everything you'll need for the LETTERS in this quilt can be cut from a 1.5" strip of fabric, and then for your BACKGROUND(S) it's good to have a 2.5" strip and a 1.5" strip to cut from.
- Work in batches. Prep all the pieces you need for a few letters at a time--doing them by word is a great way to break it up. I cut spare paper and labeled each with what letter they were for, then stacked the fabric for that letter on top to carry from my cutting table to the machine. Doing things in smaller batches helps keep you organized with what fabric goes where, etc. You certainly can break this up by doing all the same letters at once, but the benefit of doing it by word is that there's a bit more feeling of accomplishment when you're done. Plus, doing all your H's at once is no big deal, but some of the harder letters may test your patience if you're having to make a whole slew of K's or X's. This also helps with...
- Do all the 'same' type of seams at a time, per batch of letters. This is mainly for those of us who move their needle position/change presser feet for stitching straight down a marked line (for sew & flip corners, flying geese etc) vs. stitching with a scant 1/4" seam allowance. If you can do all of your sew & flip corners, flying geese-- anything else where you stitch on a line--it makes for fewer chances to forget to move your needle back over when you go on to a different stitch placement for 1/4" seams. Plus then, you can also mark all of your diagonal seam lines at the same time rather than having to stop just when it's getting good along the process to mark more.
BONUS PROJECT: Letter Garland
If you want to play with letters and words, but either don’t want to do a full quilt, or want something smaller that you can change out for every occasion you could need—these individually finished letters by Moda’s Tammy V could be just the thing for you!
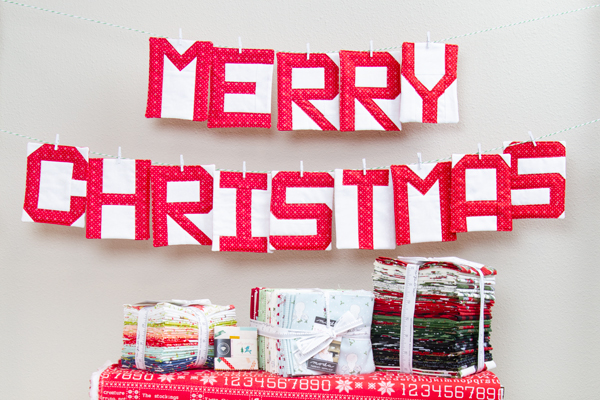
Depending on your fabric choices, they even work as a year-round garland where you can just swap out for holidays or events. Tammy made all of her letters in red, which work perfectly not just for Christmastime, but Valentines, 4th of July/patriotic, birthdays…anything you could dream up!

Or, if a garland isn’t your style, pop the first initial of your family members on all of their stockings, use them as gift tags, or add some handmade pizzazz to your Christmas tree as ornaments.
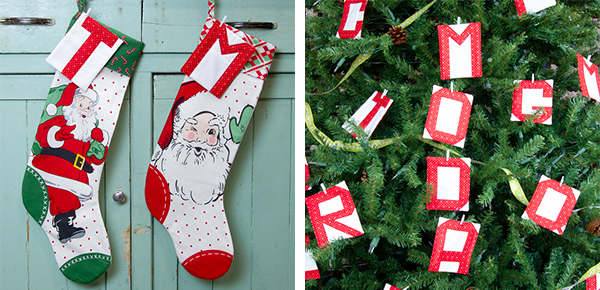
Ok ok, so how do you make them?
Make the letter blocks as shown in the Primitive Gatherings Mini Alphabet pattern, which each finish at 4” wide x 5” tall. Cut 4.5” x 5.5” backing and batting squares (the same size as the pieced letters before you sew it all together). Layer the letter and the batting with the letter facing up, and then line up the backing piece Right Sides together with the letter. Sew around the letter with a ¼” seam allowance, leaving room at the bottom to turn right side out. Clip corners to prevent bulk, turn right side out & push out corners, and press—making sure the seam allowance from the opening is tucked in at the bottom so that you have a flat edge. Topstitch or quilt as desired, making sure to sew the opening closed however you decide to stitch. Tammy quilted around the edges of the letters to emphasize each one, making sure to close that opening along the way.
Happy sewing one and all! This about covers us for this month of the Letters to Santa QAL, though we'll have a separate post coming up soon due to popular demand for the Favorite Christmas Movies variation on the project. If you missed any of the pattern links in the post, here's a list again:
- Month 1 Word Blocks Settings
- Filler Block 1: Christmas Star
- Filler Block 2: Friendship Wreath
And also a reminder that the lettering pattern itself is a purchase-pattern, available from your local quilt shop or online retailer! Mini Alphabet Quilt by Primitive Gatherings (PRI 442)
Make sure to share your progress using the hashtag #LetterstoSantaQAL on social media so we can see and share your work! We'll be checking back in on the 25th of every month through November with the next batch of blocks, tips & other project ideas.

Comments